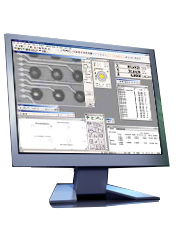
Nikon NEXIV VMR-H3030
Request a Quote or DemoNikon’s highest precision automated video measuring system is the “Master Reference Measuring System” for your metrology lab. Nikon’s highest precision automated vision system, the NEXIV VMR-H3030, has the best specifications, accuracy and repeatability of any NEXIV measuring system, with a minimum readout down to 0.01 µm. It features a 300 x 300 x 150mm stage, TTL Laser height/profile scanning, intelligent pattern recognition and low contrast edge measuring. Perfect when exceptional accuracy is critical, such as calibration of standards and gages, master dies and molds and difficult to measure or ultra-small precision parts.
Designed and Constructed for Ultra-High Precision
Conceived and designed for the purpose of sub-micron precision measurement, the VMR-H3030 is massive (3x heavier than the equivalent VMR-3020). The stage is constructed of low coefficient of expansion metal with extra heavy duty roller bearing ways. Special high resolution linear encoder scales (with low coefficient of expansion glass scales) provide read-outs that are 10x finer than our other Nexiv Measuring Systems.
Through-the-lens (TTL) Laser Focusing System
Allows users to fully utilize the powerful optics to scan at 1,000 points per second on complex profiles of 3D precision parts and a 15X Telecentric Zoom System that facilitates easy searches at low magnifications.
Unsurpassed Edge Detection
Black and gray portions of a workpiece are digitally classified into 256 levels, then edges are detected and processed based on this classification. This prevents measurement data from being affected by changes in illumination.
When the operator clicks the point to be measured, the system automatically rotates the probes, sets them at the optimum position, and sets the probe size automatically. Desired edges are easily selected by eliminating dust and burrs through a change in the contrast threshold level. Unique algorithms enhance edge detection, even at low magnifications.
Multiple Illumination Choices
A variety of illumination choices facilitate accurate edge detection in dies and molds. These include:
Two LED ring illuminators — 8-sector illumination system consisting of inner (37° oblique angle against Optical Axis) and outer (75° oblique angle) ring illuminators for observation of extremely low-contrast edges that are usually invisible under episcopic illumination.
Episcopic illumination — top light
Diascopic illumination — bottom light
Edges previously difficult to capture can be detected with high resolution.
Automeasure Software
Features interactive measurement wizards, which can be customized by each operator for future use. Intelligent search functions eliminate possible measurement errors and a multi-pattern search function automatically corrects part-to-part variation along with deviations in expected edge or feature locations. NEXIV also features a pattern matching measurement system that determines coordinate values for features too difficult to measure in the normal geometric measuring mode.
Rugged Steel Bases
For superior stability in any environment with stage rail designs normally seen on high-end machine tools.
VMR-Z120X Maximum Magnification Model
Offers even greater precision, providing optical magnification to 120x. Ideal for wafer level CSP, wafer bump height and SIP, rerouted masks and masks for MEMS. Other features:
High precision stage facilitates accurate measurements for even wider dimensions
Enables measurements of top and bottom widths of etched lines
Laser AF facilitates measurements of minuscule bump heights
Enables evaluation of cross-sectional shapes of bumps and solder balls
| Stroke (X x Y x Z) | : Standard- 300 x 300 x 150mm (11.8 x 11.8 x 5.9 in); with High Magnification module VMR-z120x 300 x 300 x 150mm (11.8 x 11.8 x 5.9 in) |
| Measuring Accuracy (X . Y) | Standard U1XY - ; High Magnification U2XY (0.9 + L/300) microns; U1XY (0.6 + L/300) µm |
| Maximum Specimen Height | Standard 150; High Magnification 150 |
| Z-axis Guide Accuracy | (0.9 + L/150) µm |
| Dimensions (W x D x H) and Weight (Main Body) | (including table) 1000 x 1230 x 1900 mm (39.4 x 48.4 x 74.8 in); 600kg (1322.8 lb) |
| Auto Focus | (Standard model/High magnification model) Image AF, Laser AF |
| Field of View | (Standard) 10 x 8 to 1 x 0.8mm; (High magnification model 1) 4 x 3.2 to 0.4 x 0.32mm; (High magnification model 2) 2 x 1.6 to 0.2 x 0.16mm; (High magnification model 3) 1 x 0.8 to 0.1 x 0.08mm |
| Minimum Readout | 0.01 µm |
| Footprint (D x W) | 1500 x 2000 mm (59.1 x 78.7 in) |
| Maximum Workpiece Weight | 10kg (22.0 lb) |
| Dimensions (W x D x H) and Weight (Illuminator) | 220 x 130 x 360mm (8.7 x 5.1 x 14.2 in); 7kg (15.4 lb) |
| Zoom Magnification | 5-step zoom for all models- (Standard) 0.75x to 7.5x; (High magnification model 1) 1.875x to 18.75x; (High magnification 2) 3.75x to 37.5x; (High magnification 3) 7.5x to 75x |
| Power Source | AC 100 to 240 V ±10%, 50/60 Hz |
| Power Consumption | Approximately 15A |
| Camera | B/W CCD or color CCD camera |
| Host Computer | Main unit PC compatible |
-

Nikon Automeasure NEXIV Software
Powerful and easy-to-use measuring and inspection software platform for Nikon NEXIV vision systems.
More Information


