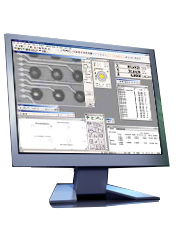
Nikon NEXIV VMR-K3040ZC
Request a Quote or DemoNikon’s Confocal NEXIV VMR-K3040ZC addresses the metrology needs of complex IC packages resulting from the enormous demand for reliable semiconductor products. The Confocal NEXIV features a new optical measuring head using confocal capabilities to solve the problem of Z-series measurement. This head supports a micron-level measuring capability, and has been optimized for semiconductor measuring by stressing low distortion to optimize the entire field of view.
Confocal Objective Lenses
Confocal Objective Lenses: 1.5x - W.D. 24mm, 3x - W.D. 24mm, 7.5x - W.D. 24mm
Advanced Image Processing
Advanced image processing enhances contrast and fidelity with powerful edge detection to ensure accuracy and repeatability.
Height Measurement
Fast, confocal high precision height measurement 0.35 at 2 sigma in 1.5 second cycle time.
Automeasure Software
New, easy-to-program, versatile VMR Automeasure software includes CAD reader, offline programming, profiling software and programming wizards.
Defect-free Progressive B/W CCD
Faster image acquisition and system speed with selected defect-free instrument grade progressive scan black and white CCD camera.
Ideal Applications
Ideal for measuring micro-dimensional 2D and 3D workpieces, all requiring exceptionally high accuracy. Examples include bump heights on advanced IC packages, MEMS, probe card, micro lens, contact lenses, photo spacers for color FPD panel, molds and others.
Confocal Technology Advantages
Widely used in bio-science research, confocal microscopy offers several advantages over conventional optical microscopy, including controllable depth of field, the elimination of image degrading out-of-focus information, and the ability to collect serial optical sections from material samples. The key to the confocal approach is the use of spatial filtering to eliminate flare in material sample images. The Nikon Confocal NEXIV uses a Nipkow disk, which features multiple, symmetrically placed spirals of pinhole apertures through which light is passed and split into mini-beams. As the disk rotates, each beam scans across a portion of the sample field and generates a 3D image. The image is projected into a digital CCD camera using optical sectioning technology. The result is a 3D image captured in one scan delivering highly accurate and reliable height measurement data.
Advanced Optics
Advanced Nikon optics provide superior images for improved repeatability and accuracy.
Telecentric Zoom
5-step 15x telecentric zoom (15:1) magnification to cover different fields of view and resolution requirements.
300 x 400 x 150mm Stage
Fast, accurate and durable - 300 X, 400Y mm travel with cast Mehanite stage with 150mm Z.
Improved Stage Accuracy
Improved stage accuracy with new lower coefficient of expansion 0.1µm resolution scales.
Large Diameter Ballscrew
Precision ground large diameter ballscrew with DC servo motors for high speed and stiffness.
TTL Laser Autofocus
Vision and TTL laser autofocus. High speed through-the-lens laser scans 1000 points/sec. with 0.5µm Z accuracy at 2 sigma.
| Stage Stroke (Xx Yy Zz) (Standard) | 300 x 400 x 150mm (11.8 x 15.8x 5.9 in) |
| Minimum Readout | 0.1 µm |
| Maximum Work Piece Weight | 20kg (44.0 lb) |
| Measuring Accuracy at 20C ±0.5K: U1x U1y | 1.5 + 4L/1000 µm |
| Measuring Accuracy at 20C ±0.5K: U2xy (Standard): | 2.5 + 4L/1000 µm |
| Z-axis Guide Accuracy | (1.5+L/150) µm |
| Camera | B/W Progressive Scan camera |
| Maximum Specimen Height (Standard) | 150mm |
| Objective 1.5x | W.D. 24mm, FOV 8 x 6mm to 0.53 x 0.4mm, Z measurement @ 2 sigma 0.6µm |
| Objective 3x | W.D. 24mm, FOV 4 x 3mm to 0.27 x 0.2mm, Z measurement @ 2 sigma 0.35µm |
| Objective 7.5x | W.D. 24mm, FOV 1.6 x 1.2 mm to 0.11 x 0.08mm, Z measurement @ 2 sigma 0.25µm |
| Auto Focus | TTL Through the lens laser and video auto focus |
| Power Source | AC 100 to 240 V ±10%, 50/60 Hz |
| Power Consumption | Approximately 13A |
| Dimensions and Weight Main Body and Table | 1150(W) x 1250(D) x 1980(H) mm, 900kg; 51.1 (W) x 49.2(D) x 80(H) in., 1980 lb |
| Dimensions and Weight Controller | 250(W) x 550(D) x 500(H) mm, 20kg; 9.8(W) x 21.7(D) x 19.7(H) in., 44.1lb |
| Footprint | 2200(W) x 1250(D) mm; 87(W) x 49.2(D) in; estimate of main unit & computer table |
| Host Computer Main Unit | Pentium 4 (Windows® 2000/XP) |
| Host Computer Monitor | 19-inch LCD flat panel (standard for USA) |
| CE (Low Voltage/ EMC/ Laser) | (LEFT BLANK ON WEBSITE) |
-

Nikon Automeasure NEXIV Software
Powerful and easy-to-use measuring and inspection software platform for Nikon NEXIV vision systems.
More Information
